


在此输入您的增值税号,然后单击验证:
您的详细信息已经过验证。增值税号注册至:
,
。
现在,您的订单的增值税税率为零。我们保留在您提出订单请求后验证这些详细信息的权利,并在需要时恢复增值税。
您的增值税详细信息无法识别或无效。您的增值税号必须与上面指定的帐单国家/地区相匹配。当前指定为 。您无需输入增值税号的国家/地区代码部分,因为已在上面的帐单地址详细信息中选择了该部分。
增值税号查询服务目前已离线。请在下面的评论或特殊说明字段中提供您的增值税详细信息,我们将在您提出订单请求后应用增值税折扣。
Rear main oil seal fitting tool for Porsche Boxster and 911 M96/M97 - 0PB105249
0PB105249/2

产品车辆组
- Porsche Boxster 986 2.5L 1997-99
- Porsche Boxster 986 2.7L 1999-02
- Porsche Boxster S 986 3.2L 1999-02
- Porsche Boxster 986 2.7L 2003-04
- Porsche Boxster S 986 3.2L 2003-04
- Porsche Boxster 987 2.7L 2005-08/08
- Porsche Boxster 987 S 3.2/3.4L 2005-08/08
- Porsche 996 C2 3.4L 1997-08/01
- Porsche 996 C4 3.4L 1997-08/01
- Porsche 996 C2 3.6L 09/01-2005
- Porsche 996 C4 3.6L 09/01-2005
- Porsche 996 C4S 3.6L 09/01-2005
- Porsche 997 MK1 Carrera 2 3.6L 2005-08
- Porsche 997 MK1 Carrera 2S 3.8L 2005-08
- Porsche 997 MK1 Carrera 4 3.6L 2005-08
- Porsche 997 MK1 Carrera 4S 3.8L 2005-08
- Porsche Cayman 2.7L 987C 2006-08
- Porsche Cayman S 3.4L 987C 2005-08
Information
Rear main oil seal fitting tool Porsche Boxster and 911 M96/M97

Fits
Boxster/Cayman 1997-2008
Porsche 911 Carrera 1999-2008 (Excludes Turbo, GT3 and GT2 models)
Description of Tool
This is a 3D Printed tool for installing the Rear Main Seal on Porsche M96/M97 engines to the correct depth without damage to the seal. The tool is 3D printed from hard, black plastic and is very solid and durable. It is aimed at DIYers and hobbyists due to its low cost in comparison to the official Porsche tool, but would be well suited to small independent garages as the tool can be reused many times without damage.
How to use
Care must be taken when using this tool as although it is designed to make the installation of the seal as easy as possible, it is still possible to damage or incorrectly install the seal if care is not taken to install the seal properly. We accept no responsibility for incorrect usage of the tool and possible damage to the seal or engine of the vehicle. We advise you to always confirm with a digital calipers or other measuring device to make sure the seal is installed at the correct depth.
To use this tool you will also need 4 M10 X 75mm bolts and 4 washers. This is to allow for the extra thickness of the tool, and to spread the force from the bolts across the surface of the tool.
The seal must first be correctly orientated and then gently located into the opening around the crankshaft. To do this, leave the blue plastic ring in place and place the seal over the end of the crankshaft. Then push the seal on gently so that the end of the crankshaft pushes the blue ring out of the seal and the seal gets pushed onto the outside of the crankshaft.
Next place the RMS fitting tool over the seal and thread each of the 4 bolts into the crankshaft, through the holes in the tool. Make sure to orientate the tool so that the cut-out for the flywheel guide pin in the crankshaft lines up with the pin. Screw each bolt in slowly until they just about make contact with the face of the tool. From this point on the seal will start to be inserted into the engine.
Turn each bolt a quarter turn at a time, turning all 4 a quarter turn before tightening the first one again, and continuing the cycle. It is very important that the bolts are tightened small amounts, one at a time to make sure that the seal is inserted straight and not at an angle which will damage the seal.
Repeat this until the face of the crankshaft comes into contact with the inner face of the tool and it will not push the seal in any further. Remember that the tool is plastic so excessive force at the point will possibly damage the tool and push the seal in too far.
The 4 bolts can now be unscrewed and fully removed from the crankshaft. The tool can then be removed. It may be a slightly tight fit, and if it is difficult to remove by hand then there are slots in the sides of the tool to allow a screwdriver or prying tool to grip the tool and remove it. If using the slots, be careful to apply even force to both sides to ensure that the tool does not come out at an angle and get stuck or potentially move the seal.
Once the tool and bolts are removed, visually inspect the seal to make sure there is no damage. Then, use a ruler, digital callipers or depth gauge, check the depth of the seal. It should measure 13mm, from the face of the crankshaft to the face of the seal. As long as the tool was used correctly and is suitable for your engine, the seal will be installed at the right depth.
These instructions are only intended as a rough guide, you should always check a workshop manual or research online to ensure the part is being installed correctly. Using this tool requires some practical knowledge so if you are not confident in your abilities please do not attempt to install the seal yourself.
相关参考编号
相关编号、被取代编号、交叉引用编号或替代编号,供比较之用。
0PB105249
您正在查看的产品与这些编号存在交叉引用关系
Fits
Boxster/Cayman 1997-2008
Porsche 911 Carrera 1999-2008 (Excludes Turbo, GT3 and GT2 models)
Description of Tool
This is a 3D Printed tool for installing the Rear Main Seal on Porsche M96/M97 engines to the correct depth without damage to the seal. The tool is 3D printed from hard, black plastic and is very solid and durable. It is aimed at DIYers and hobbyists due to its low cost in comparison to the official Porsche tool, but would be well suited to small independent garages as the tool can be reused many times without damage.
How to use
Care must be taken when using this tool as although it is designed to make the installation of the seal as easy as possible, it is still possible to damage or incorrectly install the seal if care is not taken to install the seal properly. We accept no responsibility for incorrect usage of the tool and possible damage to the seal or engine of the vehicle. We advise you to always confirm with a digital calipers or other measuring device to make sure the seal is installed at the correct depth.
To use this tool you will also need 4 M10 X 75mm bolts and 4 washers. This is to allow for the extra thickness of the tool, and to spread the force from the bolts across the surface of the tool.
The seal must first be correctly orientated and then gently located into the opening around the crankshaft. To do this, leave the blue plastic ring in place and place the seal over the end of the crankshaft. Then push the seal on gently so that the end of the crankshaft pushes the blue ring out of the seal and the seal gets pushed onto the outside of the crankshaft.
Next place the RMS fitting tool over the seal and thread each of the 4 bolts into the crankshaft, through the holes in the tool. Make sure to orientate the tool so that the cut-out for the flywheel guide pin in the crankshaft lines up with the pin. Screw each bolt in slowly until they just about make contact with the face of the tool. From this point on the seal will start to be inserted into the engine.
Turn each bolt a quarter turn at a time, turning all 4 a quarter turn before tightening the first one again, and continuing the cycle. It is very important that the bolts are tightened small amounts, one at a time to make sure that the seal is inserted straight and not at an angle which will damage the seal.
Repeat this until the face of the crankshaft comes into contact with the inner face of the tool and it will not push the seal in any further. Remember that the tool is plastic so excessive force at the point will possibly damage the tool and push the seal in too far.
The 4 bolts can now be unscrewed and fully removed from the crankshaft. The tool can then be removed. It may be a slightly tight fit, and if it is difficult to remove by hand then there are slots in the sides of the tool to allow a screwdriver or prying tool to grip the tool and remove it. If using the slots, be careful to apply even force to both sides to ensure that the tool does not come out at an angle and get stuck or potentially move the seal.
Once the tool and bolts are removed, visually inspect the seal to make sure there is no damage. Then, use a ruler, digital callipers or depth gauge, check the depth of the seal. It should measure 13mm, from the face of the crankshaft to the face of the seal. As long as the tool was used correctly and is suitable for your engine, the seal will be installed at the right depth.
These instructions are only intended as a rough guide, you should always check a workshop manual or research online to ensure the part is being installed correctly. Using this tool requires some practical knowledge so if you are not confident in your abilities please do not attempt to install the seal yourself.
相关参考编号
相关编号、被取代编号、交叉引用编号或替代编号,供比较之用。
0PB105249
0PB105249
99911349040
99710121201
0PB105249
0PB105249
您正在查看的产品与这些编号存在交叉引用关系
价格: €110.20
库存
相关产品

Information
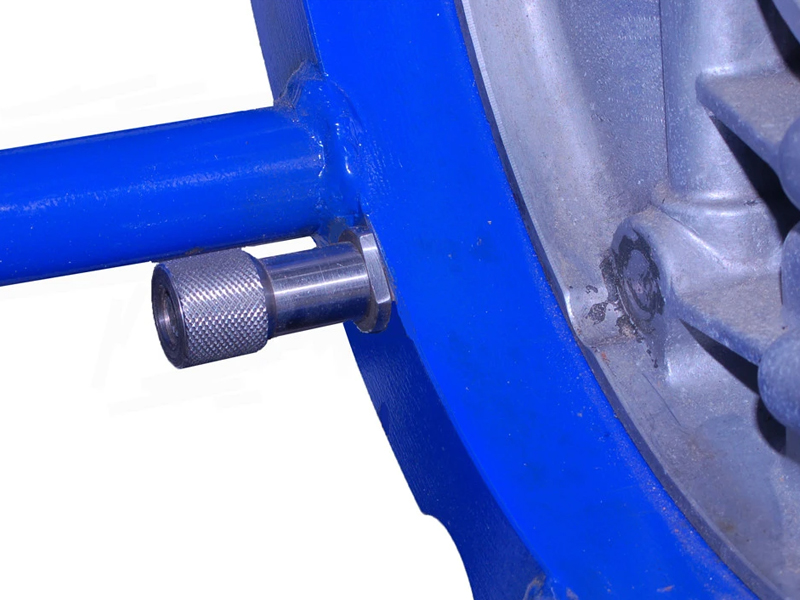
发动机和变速箱支架安装螺栓套件
#斯托姆斯基#
终于找到一种优雅的方式将发动机固定到发动机轭架上。无需套筒、垫圈和加大螺母来弥补松弛。使用这些滚花螺母和适配器,可以将不同长度的箱体螺栓安装到轭架上。这些适配器为安装离合器留出了空间。采用硬涂层铝和不锈钢材质,经久耐用。
#斯托姆斯基#
终于找到一种优雅的方式将发动机固定到发动机轭架上。无需套筒、垫圈和加大螺母来弥补松弛。使用这些滚花螺母和适配器,可以将不同长度的箱体螺栓安装到轭架上。这些适配器为安装离合器留出了空间。采用硬涂层铝和不锈钢材质,经久耐用。
价格: €75.82
库存

Information
Connector removal tool - for VAG, Porsche
For the removal of VAG & Porsche push and pull connectors.
• For the removal of VAG and Porsche connectors.
• Connectors are found on MAF sensors, coil packs, headlights, fog lights, level sensors, map sensors etc.
• Fits directly onto the push and pull connectors.
• Black plastic handle for easy grip.
相关参考编号
相关编号、被取代编号、交叉引用编号或替代编号,供比较之用。
6547
您正在查看的产品与这些编号存在交叉引用关系
For the removal of VAG & Porsche push and pull connectors.
• For the removal of VAG and Porsche connectors.
• Connectors are found on MAF sensors, coil packs, headlights, fog lights, level sensors, map sensors etc.
• Fits directly onto the push and pull connectors.
• Black plastic handle for easy grip.
相关参考编号
相关编号、被取代编号、交叉引用编号或替代编号,供比较之用。
6547
6547
您正在查看的产品与这些编号存在交叉引用关系
价格: €36.83
库存

Information
Connector removal tool long series - for VAG/Porsche
For the removal of VAG and Porsche connectors found on MAF sensors, coil packs, headlights, fog lights, level sensors, map sensors etc.
• Fits directly on to the push and pull connectors and opens the locking tabs as pressure is applied.
• Applications include MAF sensors, coil packs, MAP sensors, CPS sensors and light connectors.
• Soft grip T-handle.
• 20mm offset head, 160mm long. EU Registered Design.
相关参考编号
相关编号、被取代编号、交叉引用编号或替代编号,供比较之用。
7859
您正在查看的产品与这些编号存在交叉引用关系
For the removal of VAG and Porsche connectors found on MAF sensors, coil packs, headlights, fog lights, level sensors, map sensors etc.
• Fits directly on to the push and pull connectors and opens the locking tabs as pressure is applied.
• Applications include MAF sensors, coil packs, MAP sensors, CPS sensors and light connectors.
• Soft grip T-handle.
• 20mm offset head, 160mm long. EU Registered Design.
相关参考编号
相关编号、被取代编号、交叉引用编号或替代编号,供比较之用。
7859
7859
您正在查看的产品与这些编号存在交叉引用关系
价格: €22.57
库存